Shared Widgets
Prerequisite Reading
A shared widget is a layout definition that can be re-used in one or more documents.
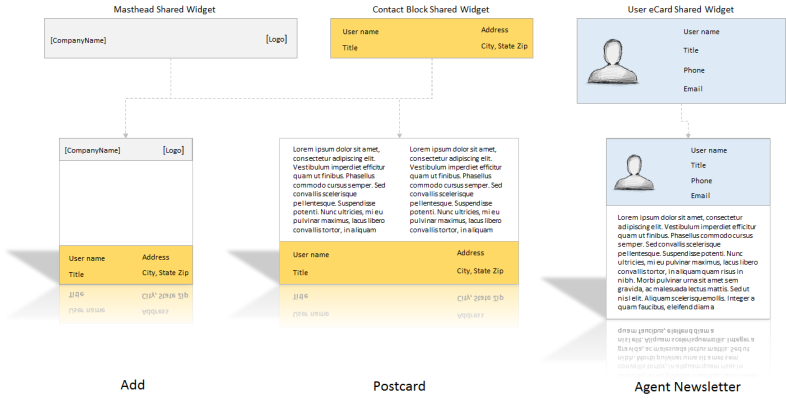
The following diagram illustrates how shared widgets can be used in one or more documents.

In the above diagram, there are three layout definitions or Shared widgets, each with its own layout.
- Masthead Shared Widget
- Contact Block Shared Widget
- User eCard Shared Widget
When should you use or create shared widgets?
If you find that you are re-creating the same layout over and over again in multiple documents then it's probably a good idea to group your common elements together into a shared widget
These layouts were made into re-usable shared widgets because when we look at the documents we need to create (Add, Postcard & Agent newsletter), we can easily spot commonalities. Therefore, rather than going into each document and creating the exact same layout multiple times. We convert these layouts into shared widgets so that we can drop them into respective documents
What are the benefits of shared widgets?
For large projects, with a re-usable widget the amount of time you spend keeping content up to date is reduced exponentially. Make a change in one shared widget and any other widget or document that uses this widget is automatically updated.
Nesting Shared Widgets
Widgets can be nested within each other. This allows you to use simpler widgets as building blocks to create more complex structures.
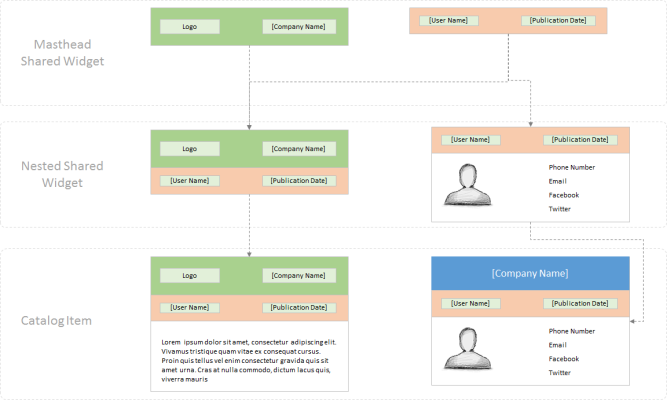
The following diagram illustrates
- How you can creating simple shared widgets, is shown in the first row.
- Embed (nesting a widget) them in more complex shared widgets, is shown in the second row.
- Finally, we include these nested shared widgets into our documents.

As you can imagine, you could create fairly complex layouts with shared widgets. The benefits of taking this approach are similar to those mentioned above.
Note: Understanding the concept of diminishing returns.
There is always a point of diminishing returns when you start nesting items. It is recommended that you group related items together into a shared widget. i.e. Using widgets (shared and nested) to group related items in a layout will save a considerable amount of work time. Creating dozens of shared widgets that each only has a single value in them is not an effective use of this feature.
Creating Shared Widgets
A Shared Widget must be created before it can be added to a template in Designer. Go to the Designer then Shared Widgets menu option as shown in the screenshot below.

Next, click the +Create Widget button.

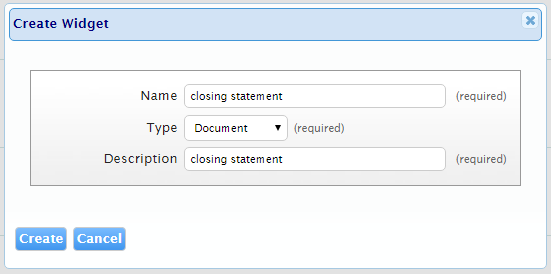
You will be prompted to input details for the new widget.

| Name | Description |
| Name | The name of the widget. |
| Type |
The Widget can be configured as either a Page Element or Document. Document widgets will be located in the Shared Documents page in the dashboard. |
| Description |
A description of the widget. |
Add Shared Widget from Content Library
- Click
 on a personalized catalog item to edit it.
 - Select or add a new page to the document.
- Drag the widget icon
 to load the content library.
 - Select a widget from the All Widgets or My Widgets tab to load the widget.
- The widget will be added the page you added in step 2.
